Caption this! Add captions to image files
One of the coolest scripts in 42 Astoundingly Useful Scripts and Automations for the Macintosh takes an image and creates ASCII art from the image. The ability to easily manipulate images at high quality is one of the great features of scripting on macOS. Even when the purpose is to produce a low-quality, retro image, as that script does.
Many of the image manipulation tasks I do, I do almost but not quite the same thing every time; it’s mind-numbingly dull in a GUI app such as GIMP or Inkscape to add a caption, for example, to the bottom or top of an image.
It’s fascinating turned into a script.
That I find things more fascinating when I can manipulate them on the command line than I do playing around with a mouse and menus may be one of the tells that make a weekend scripter. That’s a topic for another day. Today’s script, caption (Zip file, 6.0 KB), takes an image and adds a caption to it. It attempts useful defaults for everything it can, and provides command line switches for those defaults that are either difficult (or dangerous) for a computer to guess or that might need to occasionally deviate from the most likely guess.
I wrote it in Swift because that’s the easiest way to access the image manipulation libraries built in to macOS. The script can add a caption above or below (the default) an image, or layer it over an image. It can add borders, and it can resize the image proportionally, outputting it as PDF, JPG, PNG, or TIFF.
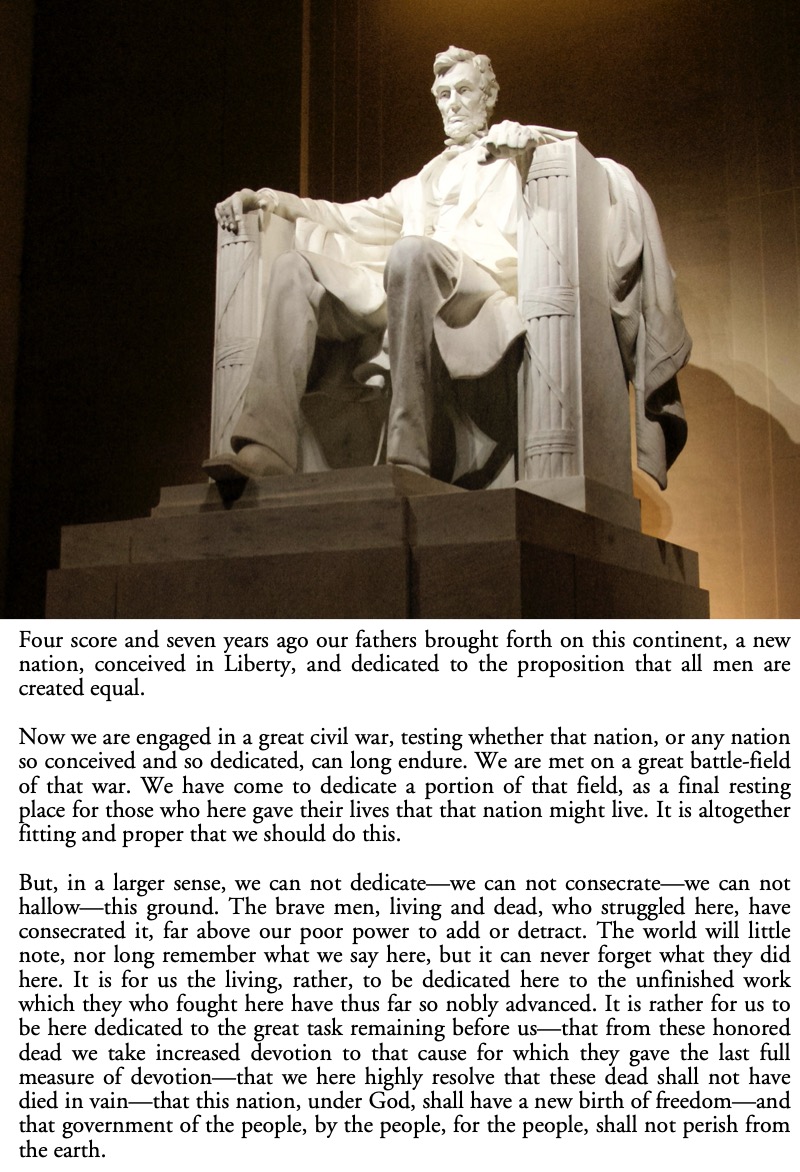
Suppose I want to put the Gettysburg Address as a caption below a photo of the Lincoln Memorial.
[toggle code]
- caption Lincoln.jpg --output Gettysburg.jpg < address.txt
The original image is “Lincoln.jpg”. The new file will be named “Gettysburg.jpg”. And it will get its text from the file “address.txt”.
Because this is long text, the script will justify it instead of centering it.
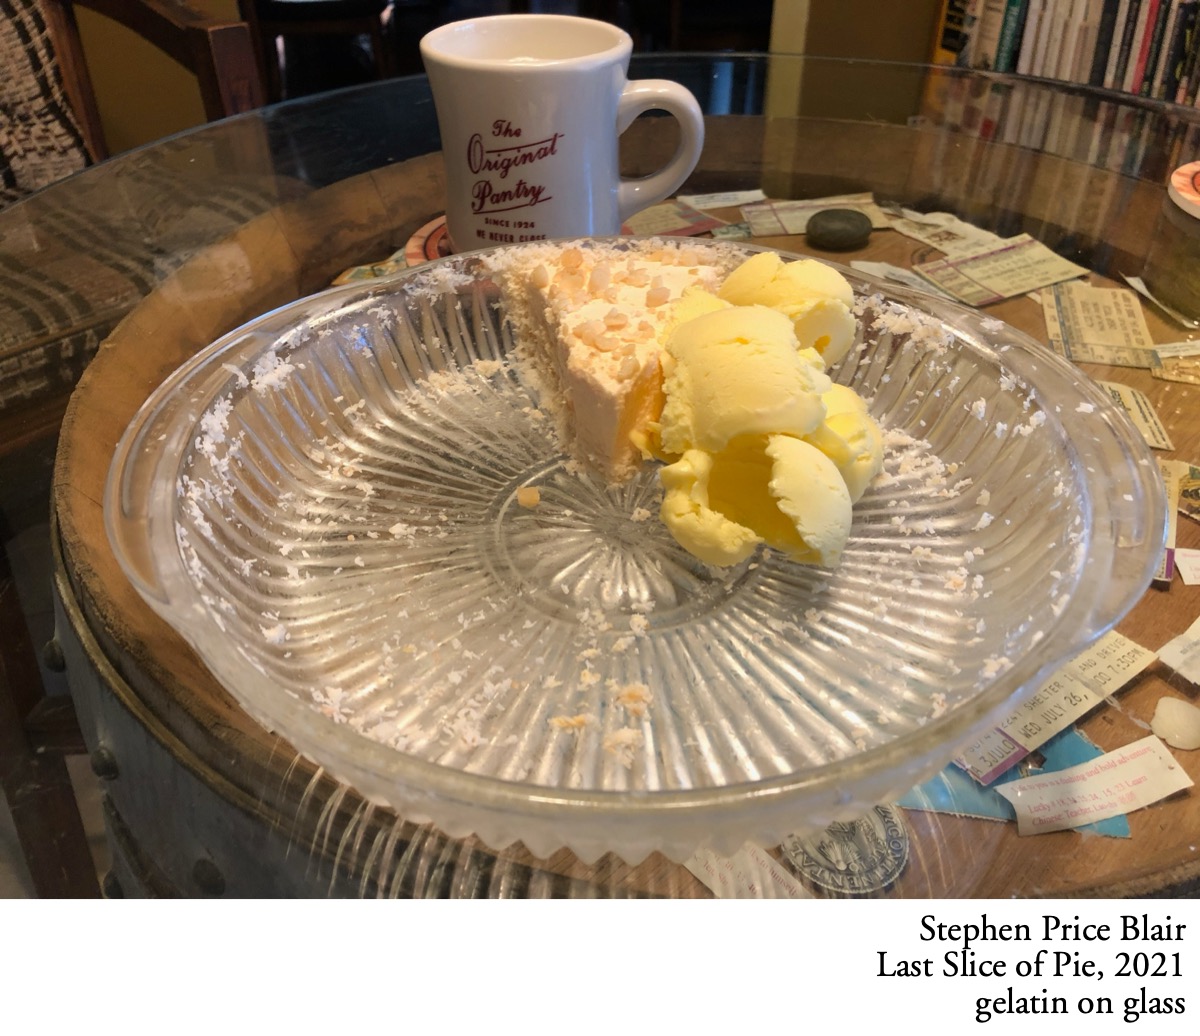
The origin of this script came when I wanted to caption a photo of the last slice of pie as a joke art piece.1
- caption pie.JPG --output "Last Slice of Pie.jpg" --align right < pie.txt
The original image is “pie.JPG”2. The new file is going to be “Last Slice of Pie.jpg”. The caption will be aligned right. The text of the museum-style label is in “pie.txt”.
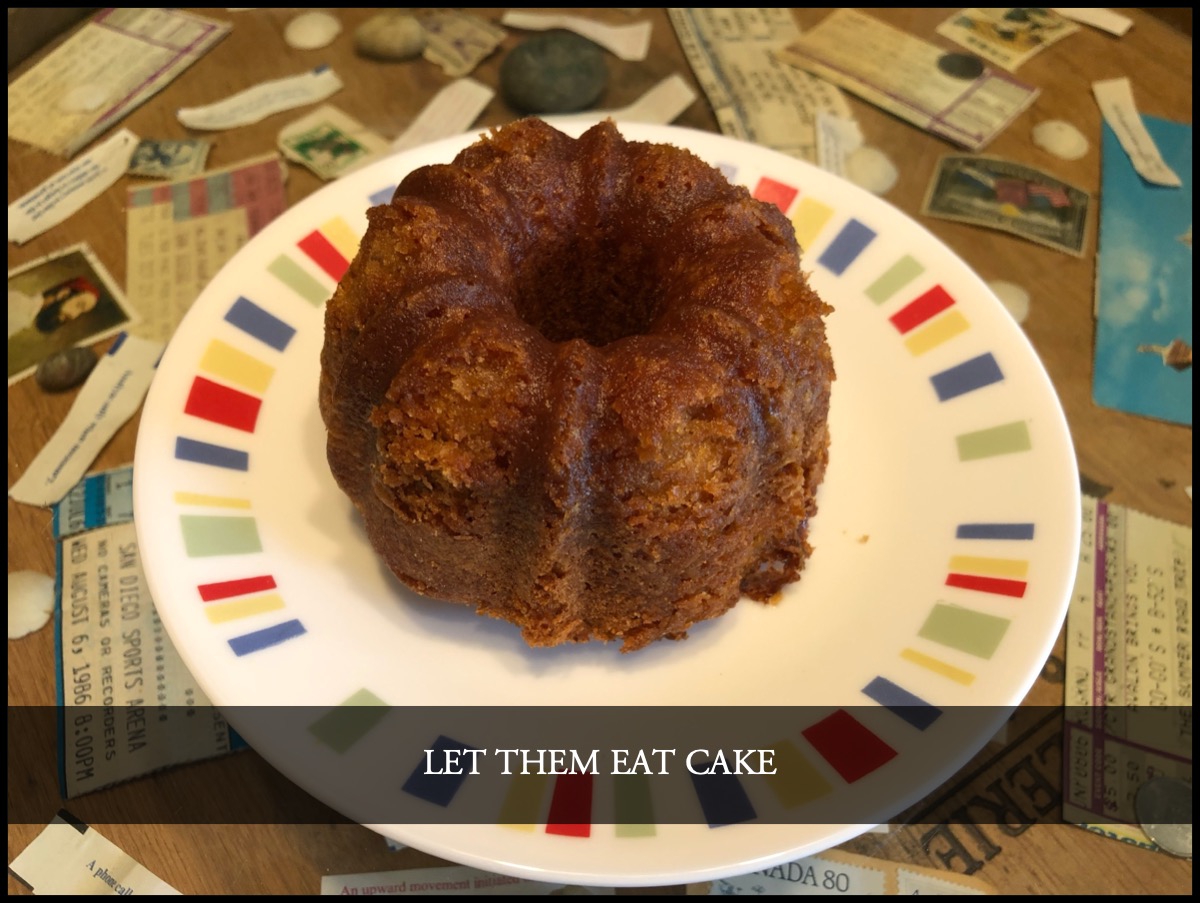
For a more complex example, I was asked what we should make for the players in a role-playing group I’m part of. Of course, I sent “let them eat cake”. But since I now had this script available, I didn’t just reply with that text. I made a captioned image of some cake.
- caption cake.JPG "Let them eat cake" --case upper --layer 8 --border --padding 3 --output rumcake.jpg --width 1200
The original image is “cake.JPG”. The caption is “Let them eat cake” except that it’s transformed to all uppercase. It is layered, that is, placed over the image about 8% up from the bottom. I added a border and I increased the padding around the text so that there was more shading above and below the caption.
The resulting captioned file will be named “rumcake.jpg”. It will be 1200 pixels wide.

The script has three basic sections:
- Parse the command line and, if necessary, read the caption from standard input. This means you can pipe text to it from any other script, type text in at runtime, or pipe a file of text to it.
- Calculate the new dimensions of the image after the caption (and/or border) is added or (if the caption is layered on top of the image) where the caption will be.
- Draw the new image with the caption and/or border added, and save it to a file.
Step 1 is a simple while loop shifting through CommandLine.arguments, running each argument through a switch of the various arguments the script understands.
[toggle code]
- var text = ""
- var alignment = ""
- var imageFile:NSImage? = nil
- var border:CGFloat = 0.0
- var padding:CGFloat = 1.0
- var outputFile = "captioned.jpg"
-
while arguments.count > 0 {
- let argument = arguments.removeFirst()
-
switch argument {
-
case "--align":
- alignment = popString(warning:"--align requires a value")
-
if !alignments.keys.contains(alignment) {
- help(message:"Text alignment “" + alignment + "” not recognized.")
- }
-
case "--border", "-b":
- border = popFloat(defaultValue:0.67)
-
case "--output", "-o":
- outputFile = popString(warning:"--output requires a filepath.")
-
if !validFiletypes.contains(where:outputFile.hasSuffix) {
- help(message:"Output image must end in: " + validFiletypes.joined(separator:", "))
- }
-
case "--padding", "-p":
- padding = popFloat(warning:"--padding requires a positive number")
-
if padding <= 0 {
- help(message:"padding must be positive")
- }
-
default:
-
if imageFile == nil && files.fileExists(atPath:argument) {
- imageFile = NSImage(byReferencingFile: argument)
-
if !imageFile!.isValid {
- print(argument, "is not a readable image.")
- exit(0)
- }
- break
- }
-
if text == "" {
- text = argument
- break
- }
- help(message:"Unknown option: " + argument)
-
if imageFile == nil && files.fileExists(atPath:argument) {
-
case "--align":
- }
- }
If no text is provided on the command line, it will read from standard input, so that text can be piped from a file or from a different command. Specifying “none” on the command line tells the script not to add a caption. I didn’t mean to make this script be a border creator; that just happened. I may end up removing that functionality from the script and creating a new script that does nothing but add a border and/or resize an image.
[toggle code]
- //read text if there is none
-
if text == "none" {
- text = ""
-
} else if text == "" {
-
while let line = readLine() {
-
if text != "" {
- text += "\n"
- }
- text += line
-
if text != "" {
- }
-
while let line = readLine() {
- }
-
switch caseTransformation {
-
case "lower":
- text = text.localizedLowercase
-
case "title":
- text = text.localizedCapitalized
-
case "upper":
- text = text.localizedUppercase
-
default:
- break
-
case "lower":
- }
Once it has text, the script will create all of the NSRects necessary to describe the location and size of the image and the location and size of the caption. There’s an imageRect and imageArea variable, and a captionRect and captionArea variable. The imageRect and captionRect variables are the actual size of the image or caption, and the imageArea and captionArea variables are the spaces where those items will be drawn in the overall image.
The overall image’s dimensions are described by outputSize, which is not a Rect, it’s just a size, that is, a height and width.
The script first creates the caption as an NSAttributedString, calculates the height of that string, and then allocates that amount of space on the final image. If the caption is being added as a layer on top of the image, it just means positioning the caption; if the caption is being added above or below the image, it means adding the height of the caption to the height of the final image.
Image locations are measured from the lower left. If the caption is on the bottom of the captioned version, the image will need to be moved up while the caption remains unmoved sitting at the origin. Whereas if the caption is on the top, it’s the caption that needs to be moved while the image sits at the origin.3
The script makes some guesses about how the caption should be created.
- The font size is adjusted relative to the width of the image. The wider the image, the bigger the font size.
- The default padding is relative to the average width of a sample of the most common letters in the English language, in this particular font.
- The default alignment for the caption is centered. But if the caption exceeds one line, the alignment is switched to justified. Determination of multiple lines is a hack. I can’t find a call to detect whether the text has wrapped or how many lines the text has wrapped to. So I check to see if the height of the caption is significantly over the height of those sample letters.
[toggle code]
- //create the text for drawing
- captionAttributes[NSAttributedString.Key.font] = font
- caption = NSAttributedString(string:text, attributes:captionAttributes)
- //spacing around the top and bottom of the caption
- let singleLine = NSAttributedString(string:"etaonri", attributes:captionAttributes).size()
- let characterWidth = singleLine.width/7
- let captionPadding = characterWidth*padding
- //captionAreaSize is the width and height of the actual text, without padding
- var captionAreaSize = NSSize(width:outputSize.width - captionPadding*2, height:0)
- //if this is more than one line, it needs to be justified instead of centered
- var captionSize = caption.boundingRect(with:captionAreaSize, options:NSString.DrawingOptions.usesLineFragmentOrigin)
-
if captionSize.width > captionAreaSize.width*0.8 && captionSize.height >= singleLine.height*2 {
- alignmentGuess = NSTextAlignment.justified
- let quoteCharacter = NSAttributedString(string:"“", attributes:captionAttributes)
- captionStyle.firstLineHeadIndent = characterWidth
- captionStyle.headIndent = characterWidth
-
if text.first == "“" {
- captionStyle.headIndent += quoteCharacter.size().width
- }
- //redo the captionSize in case changing the alignment modifies it
- captionSize = caption.boundingRect(with:captionAreaSize, options:NSString.DrawingOptions.usesLineFragmentOrigin)
- }
Adding the border’s pretty easy. NSOffsetRect lets us offset the image and the caption by the border’s thickness.
[toggle code]
- //add the border to the size
-
if border > 0 {
- border = imageRect.width*border/100
- outputSize.height += border*2
- outputSize.width += border*2
- imageArea = NSOffsetRect(imageArea, border, border)
- captionArea = NSOffsetRect(captionArea, border, border)
- captionRect = NSOffsetRect(captionRect, border, border)
- }
Since there’s a border on all four sides, the width of the border is doubled and added to the height and width of the final, captioned, image. The image being captioned and the caption itself are also adjusted right and up to make room for the left and bottom border.
Once the calculations are complete, creating the final image is a snap.
[toggle code]
- //create the captioned image
-
var outputImage = NSImage(size:outputSize, flipped: false) { (outputRect) -> Bool in
- imageFile!.draw(in:imageArea, from:imageRect, operation:NSCompositingOperation.copy, fraction:1.0)
- //add the caption, if any
-
if text != "" {
- backgroundColor.setFill()
- captionRect.fill()
- caption.draw(in: captionArea)
- }
- //draw the border if requested
-
if border > 0 {
- borderColor.setFill()
- outputRect.frame(withWidth:border)
- }
- return true
- }
-
if (outputWidth > 0.0) {
- outputImage = scaleImage(image:outputImage, width:outputWidth)
- }
All it does is draw the image, draw the caption, and draw the border at the locations already calculated.
Saving the image is also not difficult, although it is tricky. There’s a different way of getting the file data if the output should be a PDF than if the output is a TIFF, JPG, or PNG file. And since the default format of an image on macOS is the TIFF format, format conversion is necessary to save it as a JPG or PNG.
[toggle code]
- //convert image to desired format
- var imageData:Data?
-
if outputFile.hasSuffix(".pdf") {
-
guard let pdfPage = PDFPage(image: outputImage) else {
- print("Unable to acquire PDF data.")
- exit(0)
- }
- imageData = pdfPage.dataRepresentation
-
guard let pdfPage = PDFPage(image: outputImage) else {
-
} else {
- imageData = outputImage.tiffRepresentation
-
if !outputFile.hasSuffix(".tiff") {
- let bitmapVersion = NSBitmapImageRep(data: imageData!)
- var filetype = NSBitmapImageRep.FileType.png
-
if outputFile.hasSuffix(".jpg") {
- filetype = NSBitmapImageRep.FileType.jpeg
- }
- imageData = bitmapVersion!.representation(using: filetype, properties:[:])
- }
- }
- //write image to file
-
do {
- try imageData!.write(to: NSURL.fileURL(withPath: outputFile))
-
} catch {
- print("Unable to save file: ", outputFile)
- }
The hardest part of this script was not manipulating the images or creating image and PDF files from them. That takes more lines of code, but it wasn’t difficult. The difficult part was deciding what required switches and what could just be put on the command line.
There are three items that will almost always need to be provided to the script: the image to be captioned, the caption itself, and the filename of the captioned image. The first two were easy. If something’s provided naked on the command line and it matches an existing file, it’s almost certainly the image to be captioned.4 If something’s provided naked on the command line and it does not match an existing file, it’s the caption.
Of course, it could be that the latter is also the filename of the image to be created. That will sometimes exist, if I’m playing around with different options, and sometimes not exist, if this is the first caption I’ve attempted. It’s very difficult to come up with automated logic for knowing when a filename is the output file and so should be erased and replaced, and when it is not the output file and so definitely should not be erased and replaced.
I considered using the caption text as the filename, but that seems even more likely to occasionally conflict with filenames that should not be erased and replaced. I even considered just sending the captioned image out to standard output, so that it has to be piped to the appropriate file. I’ve done that before. It turns out to be very useful almost, but not quite, never. The purpose of providing text to standard output is so that it can be piped to text manipulation scripts. There are very few image manipulation scripts that accept their image from standard input.
Since I’ve written a couple such scripts myself, I considered starting a trend, but in practice it doesn’t make sense to accept images from standard input. The images I always want to run scripts on are photos, and photos exist as files.
Everything is specified in relation to either the image width or the image height, as appropriate.
- The font size is normalized arbitrarily to the image width.
- The vertical margin is set by percentage of the image height.
- The border width is set by percentage of the image width.
- Padding is a multiple of character width, which itself is normalized to the image width.
This means that if you switch to a higher quality version of the same photo, the captioned result should maintain the same apparent locations. Font size 24 on a 1200 x 900 image should look the same as on a 2400 x 1800 image.
Almost all of the numbers are CGFloat, because that’s what almost all of the NS calls require.
At the moment I can only think of one feature I’m likely to add. I have vague recollections of needing captions with a headline. Technically this will be very easy to add; it’ll mean changing from NSAttributedString to NSMutableAttributedString, with the headline being the first entry in the array, and the rest of the lines being the rest of the entries. I haven’t added this feature yet because I expect that I’ll have a better idea of how it should work when I have a real-world example to work from.
The full script is currently 476 lines of code; you can download the caption.zip file (Zip file, 6.0 KB), unzip it, and put it in your ~/bin directory, or wherever you store your scripts. You may find the edit script useful to ensure that it has the correct permissions to use as a command-line script.
- May 25, 2022: ISBN (128) Barcode generator for macOS
-
There are currently four code generators within CIFilter. The QR code generator that I wrote about earlier is probably the most useful for general use, although the Aztec code generator has some interesting potential for encoding more text into smaller spaces. There’s also a PDF417 barcode generator, commonly used for id cards and passes.
There is also a Code 128 barcode generator, commonly used for UPC codes on books. If you publish a book on Amazon, for example, Amazon gives you the option of putting your own barcode on the back of the book. Otherwise, their barcode will go on without regard for your back cover image.
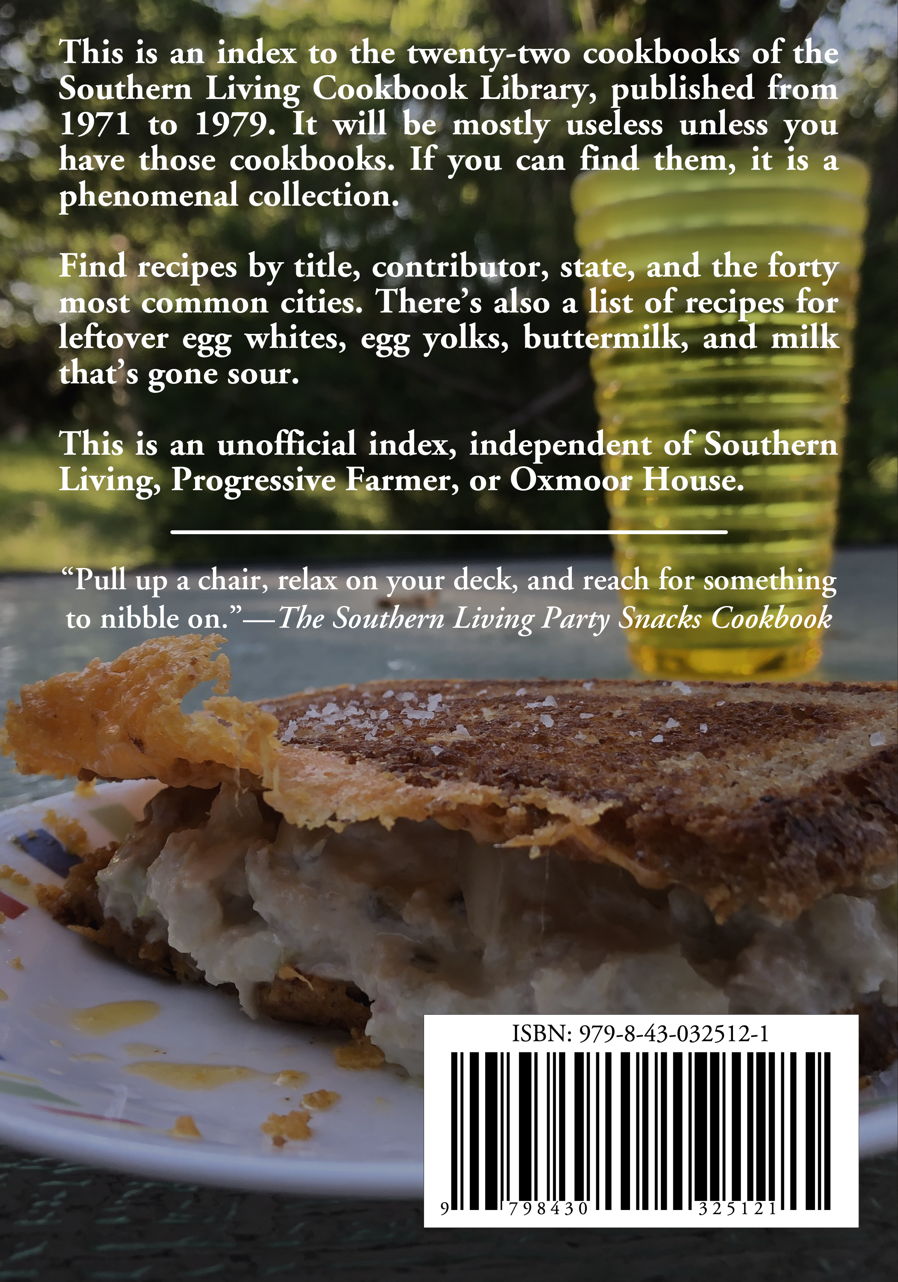
I recently wrote a script to create an ISBN barcode (Zip file, 3.0 KB) because I wanted to place my own barcode on my Unofficial Index to the Southern Living Cookbook Library. The code for creating a Code 128 barcode in Swift is pretty much exactly the same as for creating a QR code in Swift.
[toggle code]
- //generate barcode
- let isbnData = isbn.data(using: String.Encoding.utf8)
- var isbnImage:CIImage? = nil
-
if let barcodeFilter = CIFilter(name: "CICode128BarcodeGenerator") {
- barcodeFilter.setValue(isbnData, forKey: "inputMessage")
- barcodeFilter.setValue(0.0, forKey: "inputQuietSpace")
- isbnImage = barcodeFilter.outputImage?.transformed(by:CGAffineTransform(scaleX: scale, y: 1.6*scale))
-
} else {
- print("Unable to get barcode generator")
- exit(0)
- }
Just as with the QR code, the string to be encoded (in this case, in the variable
isbn) must be converted to raw NSData.1I set the quiet space around the barcode to zero, because I’m going to handle the whitespace later using padding. The default barcode is very thin, and will have to be very wide to meet Amazon’s height requirements, so I scale the height of the barcode up by 60% more than its width.
My Swift barcode creator replaces a much simpler Python version:
- March 23, 2022: Place a QR code over an image in macOS
-
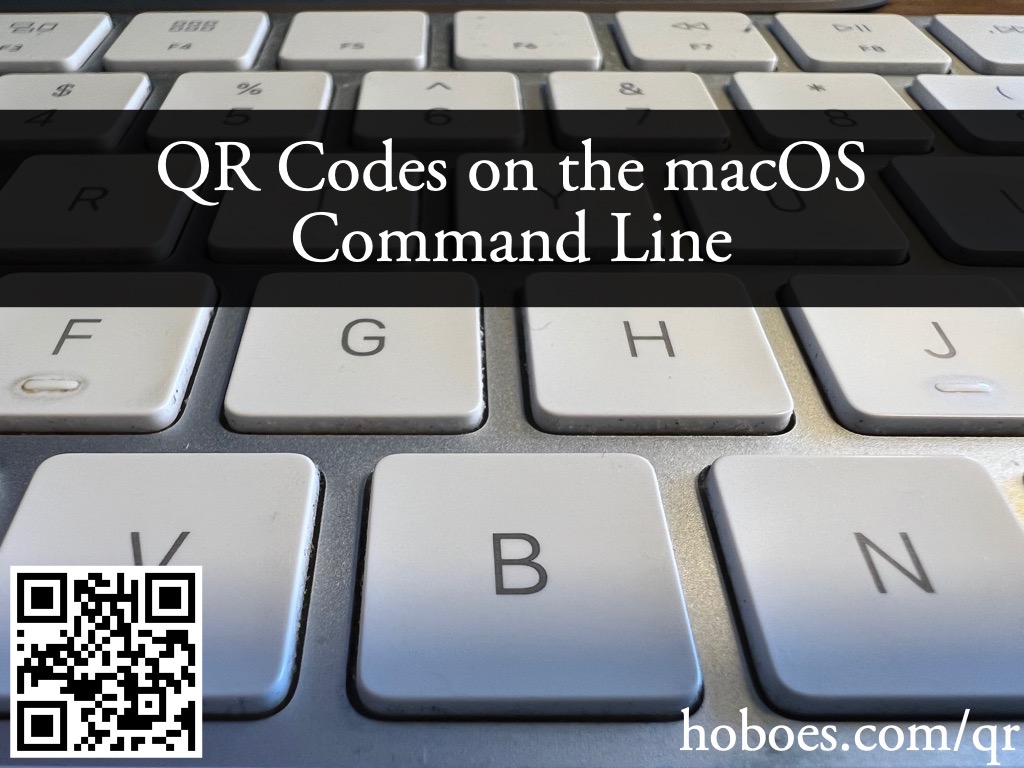
You can caption an image with more than just text. I was looking at a QR code the other day and wondered, how hard would it be to create one of my own for my postcard project? So I created this command-line script (Zip file, 4.0 KB) to take an image and some text, and create a QR image from it. Having done that, it was a relatively simple step to layer the QR code over an existing image from my Mac.
I usually just drag a photo from the Photos app onto the command line to generate a captioned image or a QR-coded image.
image filepath to image to overlay QR code on text text to encode into QR square --align <alignments> align QR code to top, bottom, right, left, center, right-center, or left-center --aztec use Aztec code generator --bgcolor <color> QR code background color (formats: r,g,b,[f]; FFFFFF[FF]; grey) --fgcolor <color> QR code foreground color (formats: r,g,b,[f]; FFFFFF[FF]; grey) --help print this help and exit --level <level> set QR code correction level low, medium, quartile, or high --opacity <0-100> set the opacity on the background image --ratio <10-90> ratio of QR code to image size; current: 25.0 --save filename to save as --width <size> create an image this many pixels wide QR codes can be created on their own with just the text that should be encoded. I created the bare QR code for this blog post using:
- qr "“Be cautious, but be adventurous and the rewards will be tremendous.”—James S. Coan, Basic FORTRAN, p. 83" --save caution.png
The image can be saved as anything; be aware that if you don’t specify a file to save as, it will save it as “QR.png”, and it will erase any existing “QR.png”.
I created the image for this blog post using:
- qr https://hoboes.com/qr keyboard.jpg --save keyboardQR.jpg --align left
The code can be aligned vertically and horizontally. Most of the alignments are self-explanatory; left-center and right-center align horizontally to the center of the left half of the image or to the right half of the image, respectively.
Alignments make no difference if you’re creating a QR code on its own, without a background image.
I’ll admit up front—it wasn’t much of a joke. But like most online communities it has a tendency to get silly at times.
↑Dragging images out of Photos on macOS almost always results in capitalized extensions; I suspect this is because the iPhone I took them on creates all-cap filenames.
↑The “origin” of a coordinate system is where both x and y are 0, often specified as “0,0”.
↑I considered assuming that if it’s not an image file, it’s a file containing the caption text. That seems likely to be exceedingly rare, so rare that it ought to provide a warning in any case.
↑
- 42 Astoundingly Useful Scripts and Automations for the Macintosh
- MacOS uses Perl, Python, AppleScript, and Automator and you can write scripts in all of these. Build a talking alarm. Roll dice. Preflight your social media comments. Play music and create ASCII art. Get your retro on and bring your Macintosh into the world of tomorrow with 42 Astoundingly Useful Scripts and Automations for the Macintosh!
- Caption image files (Zip file, 6.0 KB)
- A Swift script on macOS to add captions to image files.
- Edit (Zsh)
- One of the first scripts in the book is a script to edit scripts. But that elicits a bootstrapping problem. Without the edit script, you can’t use the edit script to edit the edit script!
More command line
- Pipe viewer command-line progress report
- The “pv” command provides a simple progress bar when piping large files to a script.
More images
- Calculate poster pixel sizes from an existing image file
- This script takes a height and a width in whatever units you wish, an existing set of pixel dimensions for an image file, and calculates which pixel dimension should be cropped to match the poster size.
- Image dimensions and orientation in Mac OS X Python
- It’s easy enough to get an image’s height and width, but some images also have an orientation in their metadata that causes them to need rotation before displaying.
More NSAttributedString
- Text to image filter for Smashwords conversions
- Smashwords has very strange requirements for ebooks. This script is what I use to convert books to .doc format for Smashwords, including converting tables to images.
More NSImage
- Creating searchable PDFs in Ventura
- My searchablePDF script’s behavior changed strangely after upgrading to Ventura. All of the pages are generated at extremely low quality. This can be fixed by generating a JPEG representation before generating the PDF pages.
- ISBN (128) Barcode generator for macOS
- Building on the QR code generator, this script uses CIFilter to generate a Code 128 barcode for encoding ISBNs on book covers.
- Avoiding lockFocus when drawing images in Swift on macOS
- Apple’s recommendation is to avoid lockFocus if you’re not creating images directly for the screen. Here are some examples from my own Swift scripts. You can use this to draw text into an image, and to resize images.
More Swift
- Creating searchable PDFs in Ventura
- My searchablePDF script’s behavior changed strangely after upgrading to Ventura. All of the pages are generated at extremely low quality. This can be fixed by generating a JPEG representation before generating the PDF pages.
- Create searchable PDFs in Swift
- This Swift script will take a series of image scans, OCR them, and turn them into a PDF file with a simple table of contents and searchable content—with the original images as the visually readable content.
- ISBN (128) Barcode generator for macOS
- Building on the QR code generator, this script uses CIFilter to generate a Code 128 barcode for encoding ISBNs on book covers.
- Place a QR code over an image in macOS
- It's simple in Swift to create a QR code and place it over an image from your Photos or from any file on your computer.
- Catalina vs. Mojave for Scripters
- More detail about the issues I ran into updating the scripts from 42 Astounding Scripts for Catalina.
- Three more pages with the topic Swift, and other related pages
